
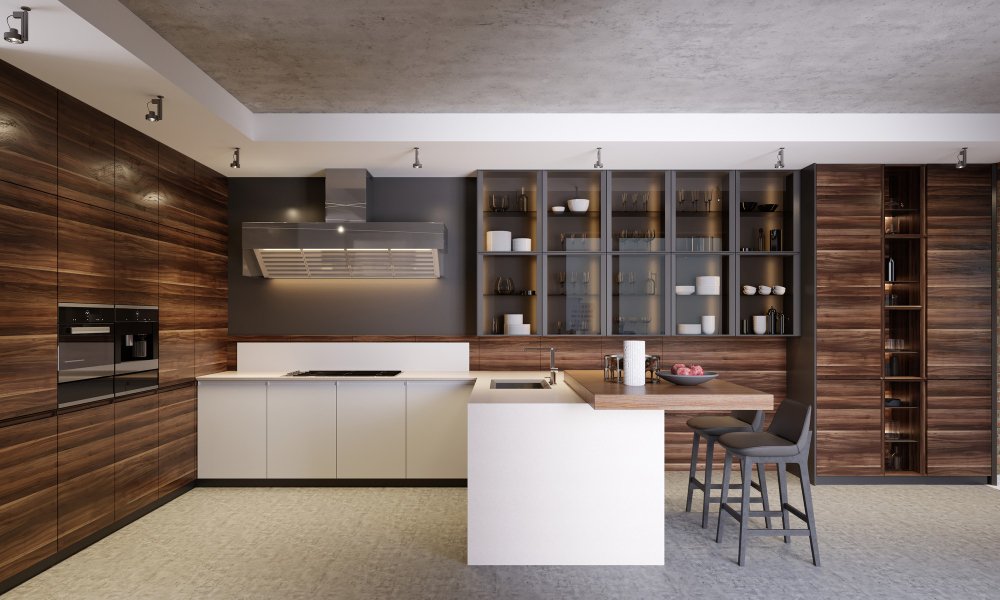
Kitchen Island with Seating: A Step-by-Step Guide to Better Kitchen Design
A well-planned Kitchen Island with Seating can completely change how you use your kitchen. It can provide extra workspace in the morning, become a comfortable place for casual meals, give children room to do homework, and allow guests to spend time with you while you cook. However, adding stools to an island is not enough to create a successful design. The island must fit the room, support natural traffic patterns, provide comfortable legroom, and complement the way you prepare meals. If the proportions are wrong, even a beautiful island can make the kitchen feel crowded and difficult to use. The best approach is to plan the island one decision at a time. Follow these three steps to compare the most useful designs, calculate the right amount of seating, and create an island that feels like a natural part of your kitchen.Step 1: Choose an Island Shape That Fits Your Kitchen
Start with the shape of the room rather than a photograph you found online. A large rectangular island may look impressive in a spacious showroom, but it can interrupt movement in a smaller kitchen. The right design should improve circulation instead of forcing people to squeeze around cabinets, appliances, and occupied stools. Before choosing a style, identify the island’s primary purpose. Will it be used mainly for food preparation, everyday dining, entertaining, storage, or a combination of several functions? Use this planning checklist:- ✓ Identify the main activities that will happen at the island.
- ✓ Count how many people need seats every day.
- ✓ Mark the locations of the sink, refrigerator, cooktop, and dishwasher.
- ✓ Check how appliance doors open into nearby walkways.
- ✓ Decide whether you need additional cabinets or open legroom.
Design 1: Straight Rectangular Island
A rectangular island is one of the most versatile options because it works well in open-concept kitchens and traditional layouts. The long surface provides room for food preparation, serving, and seating along one side. This design is especially practical when you want three or four stools arranged in a clean line. It also offers plenty of cabinet space on the working side, allowing you to separate storage from seating. A rectangular island works best when:- The kitchen has a long, open central area.
- You want seating to face the cooking zone.
- You need a combination of drawers, cabinets, and countertop space.
- You prefer a simple design that works with many kitchen styles.
Design 2: L-Shaped Island
An L-shaped island creates two connected surfaces and can divide a large kitchen into separate activity zones. One section may be used for preparation while the shorter section provides seating. This configuration can make conversations feel more natural because guests are not all seated in a single straight row. People sitting around the corner can see one another more easily, making the island feel closer to a dining table. Use an L-shaped island carefully. Its extended footprint requires more floor space and may create an awkward interior corner if the cabinetry is not planned correctly.Design 3: T-Shaped Island
A T-shaped island combines a working island with a table-like seating extension. The main section can contain storage, appliances, or a sink, while the attached dining surface creates a dedicated place for meals. This layout is a strong choice for families who want the kitchen island to function as an alternative to a separate breakfast table. It clearly separates cooking tasks from dining and can provide more comfortable seating than a narrow countertop overhang.TipUse painter’s tape to outline the proposed island on the floor. Place chairs or boxes where the stools will go, then walk through the kitchen and open nearby appliance doors. This simple test can reveal layout problems before cabinets are ordered.
Design 4: Mobile or Freestanding Island
A mobile island can be a practical solution when the kitchen does not have enough space for a permanent structure. It can provide additional preparation space when needed and move out of the way when the room must accommodate more people. Some movable islands include locking wheels, folding countertop sections, shelves, or compact seating. They are particularly useful in apartments, smaller homes, and kitchens where flexibility matters more than permanent storage.⚠ WarningDo not place a large fixed island in a kitchen simply because the floor appears open. Account for occupied stools, open cabinet doors, appliance handles, and people passing behind seated guests. An island that is too large can reduce both safety and efficiency.
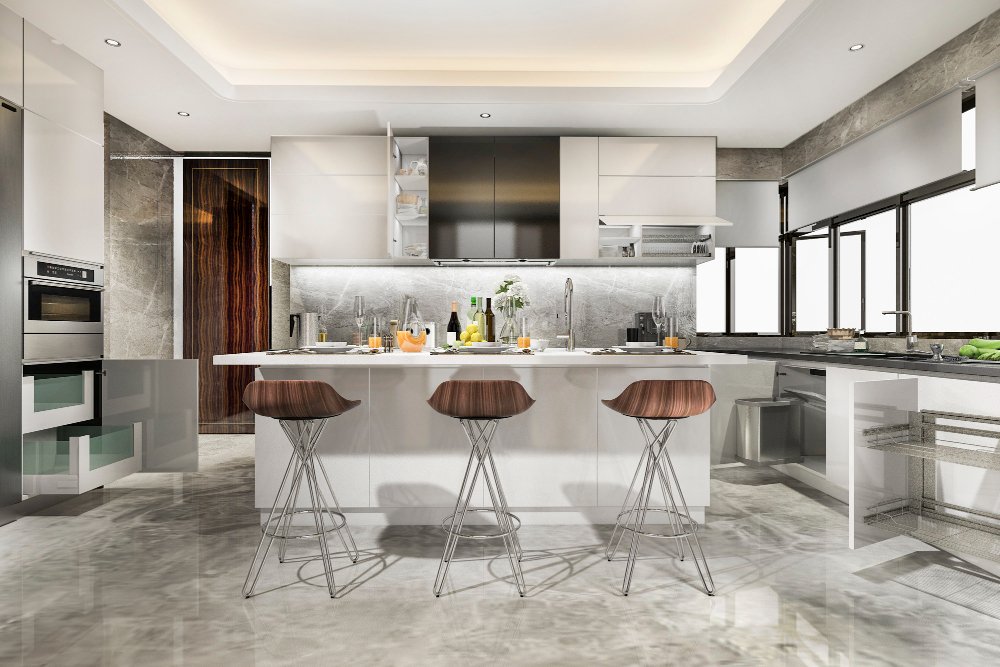
Step 2: Plan Comfortable Seating and Clearances
Once you select the island shape, determine how the seating will function. Comfortable seating requires more than enough countertop width for a stool. You also need appropriate surface height, knee space, elbow room, and clearance behind each seat. Begin by deciding whether you want table-height, counter-height, or bar-height seating.| Seating Style | Typical Surface Height | Best Use |
|---|---|---|
| Table Height | Approximately 30 inches | Longer meals and standard dining chairs |
| Counter Height | Approximately 36 inches | Everyday dining, homework, and casual conversation |
| Bar Height | Approximately 42 inches | Raised seating zones and visual separation |
How Many Seats Can the Island Hold?
The answer depends on the usable length of the seating edge. Avoid squeezing in an extra stool simply to increase capacity. People need enough width to sit, eat, and move their arms without bumping into one another. As a practical starting point, plan approximately:- 24 inches of width per person for casual seating.
- More space for wide stools or chairs with arms.
- Additional room at corners where two seating sides meet.
- Open space beneath the counter for knees and feet.
Choose the Best Seating Arrangement
Placing every stool in one straight row is efficient, but it is not always the most social arrangement. If the island is large enough, consider seating on two adjacent sides. This allows people to face one another and creates a more conversational setting. Common seating arrangements include:- One-sided seating: Best for narrow rectangular islands.
- Corner seating: Places stools on one long side and one short end.
- Three-sided seating: Creates a table-like arrangement around a large island.
- Attached table seating: Separates dining from the main work surface.
- ✓ Match the stool height to the countertop.
- ✓ Provide enough overhang for comfortable knee space.
- ✓ Leave room between each seat.
- ✓ Check the walkway behind occupied stools.
- ✓ Select backrests if the island will replace a dining table.
- ✓ Choose wipeable materials for households with children.
⚠ WarningDo not select stools before confirming the finished countertop height and overhang. A stool that is only a few inches too tall can leave too little room between the seat and counter, making the island uncomfortable to use.
Step 3: Add Storage, Appliances, Lighting, and Finishing Details
After the island shape and seating plan are established, decide what the working side should contain. This is where the island becomes more than a dining surface. Thoughtful storage and appliance placement can improve the entire kitchen workflow. Start with storage. Deep drawers are practical for cookware, mixing bowls, and small appliances. Narrow drawers can organize utensils, towels, and food-storage supplies. Cabinets may hold larger items, while open shelves can display cookbooks or decorative pieces. Useful island storage options include:- Wide drawers for pots and pans
- Tray dividers for baking sheets
- Pull-out waste and recycling bins
- Microwave storage
- Open shelving at the island ends
- Charging drawers for phones and tablets
- Shallow cabinets beneath the seating overhang
Decide Whether to Include a Sink or Appliance
An island sink can create an efficient preparation or cleanup zone, especially when the dishwasher is installed nearby. It also allows you to face the room rather than a wall while working. A cooktop can turn the island into the main cooking center, but it requires careful planning for ventilation, electrical or gas connections, heat-resistant clearances, and protection for seated guests. In many family kitchens, keeping active cooking away from the seating side creates a safer and more relaxed arrangement. Before adding utilities, ask:- Will the appliance improve the workflow?
- Can plumbing, gas, or electrical service reach the island?
- Will the appliance reduce necessary storage?
- Is there enough separation between cooking and seating?
- Will ventilation affect the appearance of the room?
Choose a Durable Countertop
The countertop must withstand preparation, dining, spills, homework, and everyday clutter. Quartz is a popular choice because it provides a consistent appearance and is generally easy to maintain. Granite offers natural variation, while butcher block adds warmth but requires more care. Consider the island’s visual role as well. A contrasting countertop can make the island a focal point, while matching perimeter surfaces creates a calm, continuous design. Waterfall edges can give a modern island a sculptural appearance, but they may increase material and fabrication costs.Plan Lighting Around the Island
Pendant lights can define the island and provide focused illumination. Their size and spacing should relate to the countertop rather than simply filling the ceiling area. For a long island, use several smaller pendants or a pair of larger fixtures. Keep the lights high enough that they do not block views across the kitchen, but low enough to illuminate the work surface effectively.TipPlace decorative features on the seating side and practical features on the working side. Finished panels, furniture-style legs, or a contrasting paint color can make the island attractive from adjoining rooms, while drawers and appliances remain convenient for the cook.
Final design checklist:
- ✓ Confirm the island dimensions one final time.
- ✓ Coordinate seating with the finished counter height.
- ✓ Place storage near the tasks it supports.
- ✓ Keep hot appliances away from seated guests.
- ✓ Include electrical outlets where required and useful.
- ✓ Select durable, easy-to-clean surfaces.
- ✓ Center lighting over the actual island position.
- ✓ Review the design from every side of the room.